
Open and inspect your PDF
Open the file or drag it into Connect. Check the page dimensions and orientation, then use zoom and the ruler to inspect the label. The built-in calibration sample is a useful first test.
Have your PDF ready and install the printer driver. Then preview, calibrate and print in the desktop application.
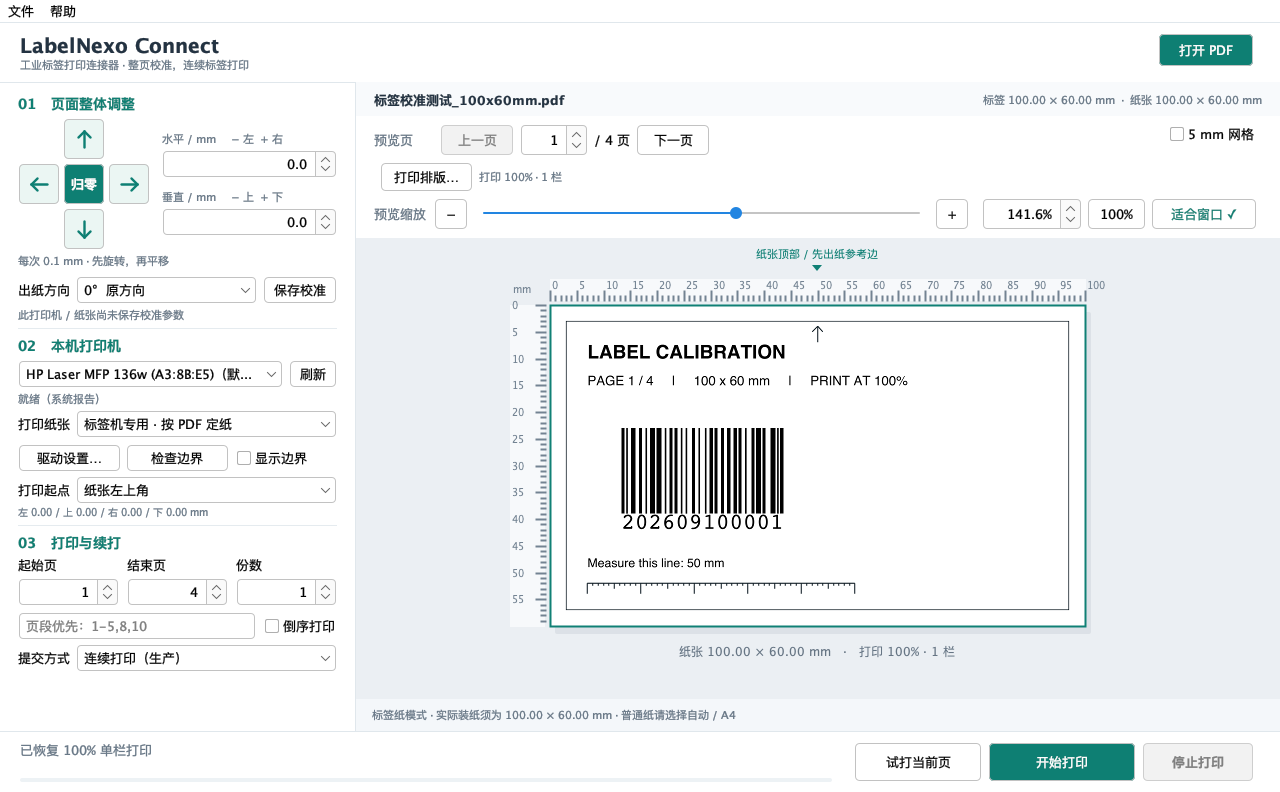
Open the file or drag it into Connect. Check the page dimensions and orientation, then use zoom and the ruler to inspect the label. The built-in calibration sample is a useful first test.
Select the installed printer and confirm the actual paper size. Rotate or scale if needed; use the arrow controls to move the whole page in 0.1 mm steps. Save calibration for this printer and paper.
Print the current page and measure the result. Once the placement is correct, choose the range and copies for the full run. If printing is interrupted, check the last good label and select the page to resume from.
Stopping prevents further submissions, but labels already buffered by the printer may still print. Confirm paper loading and printer settings with a test before a production run.